Sub-Total: $0.00
Low Moisture Cleaning for High-Value Contents
By Jessika James
In the world of cleaning and restoration, finding methods that strike the perfect balance between effectiveness and safety has always been a challenge. When it comes to high-value items like cherished heirlooms, delicate fabrics, or prized possessions, this challenge becomes even more daunting. Traditional cleaning methods often carry the risk of damage from excessive moisture, leaving us in a constant dilemma: how to clean thoroughly without causing harm?
Introducing low moisture cleaning—a new approach to cleaning that's reshaping how we care for our valuable items. Low moisture cleaning goes beyond mere removal of dirt and grime; it represents a comprehensive method of safeguarding your possessions. By utilizing minimal moisture, it ensures thorough cleaning without jeopardizing the integrity of your valuables. It's all about striking the right balance between effective cleaning and maintaining safety.
In this blog, we're delving into the world of low moisture cleaning to explore its numerous benefits and why it has become the preferred choice for preserving high-value belongings. Throughout our exploration, we'll unravel the science behind low moisture cleaning, shedding light on its evolution and the wide array of applications where its advantages truly shine. From antique furniture to contemporary artworks, from historical textiles to modern electronics—low moisture cleaning emerges as the cornerstone of preservation, providing a reliable defense against the effects of time and neglect. Let’s dive in!
Imagine a baseball signed by Babe Ruth, valued at $22K, contaminated with tear gas. Picture a bisque doll from the 1870s, valued at $12K, tainted with fire residues. Envision a Beatles vinyl record and album cover, valued at $17K, affected by Condition 2 mold. Think about a modern Dior wedding dress, valued at $5K, contaminated with fire suppressant foam. What do they all have in common? They were all successfully cleaned and restored using low-moisture cleaning methods!
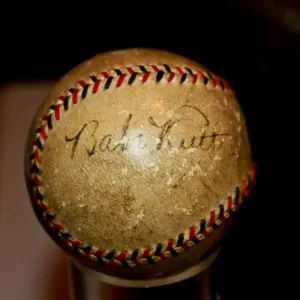
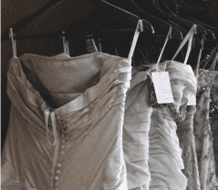
Wet and damp cleaning practices can cause moisture driven issues such as shrinkage, swelling, surface distortion, and dye bleeding on delicate or sensitive surfaces. On natural cellulosic surfaces such as paper or cardboard and fabrics, such as cotton, linen, and viscose/rayon there is the potential of browning.
Contents cleaning continually presents technicians with different restoration scenarios where low-moisture cleaning practices are an invaluable tool. The two low moisture practices I often use in my studio are dry compound and dry foam cleaning methods.
In the intricate world of contents cleaning, technicians encounter diverse materials, surfaces, and fabrics that can present unique challenges. Effectively cleaning contaminated contents demands a deep understanding of contamination soil, soil penetration levels, surface porosity, and chemical reactions—how a chemical affects both contaminating soil and the surface of the item or object. As always, before attempting any cleaning practices a close inspection and extensive pre-testing must be performed as many of the absorbent compound products contain solvents that can damage or dissolve surfaces. A hazard assessment will determine the level of PPE a technician shall wear during the cleaning process.
Absorbent Compound Cleaning Method
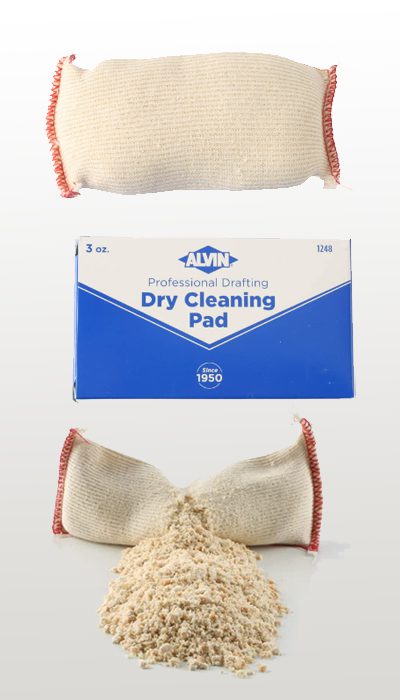
Absorbent compound products utilize organic or synthetic media such as mineral powders, minced sponges, ground art gum erasers, or other absorbent granular carriers. These carriers are saturated with cleaning agents and solvents to loosen, dissolve, and attract soils. With certain compounds, the dry product is slightly moistened with water to activate the absorbed or adsorbed cleaning chemicals.
The product is distributed onto the surface of the item or object (I usually use a common baking sifter or hand-held strainer) and agitated into the surface with a soft brush, a sponge, a foam tipped swab, or in the case of larger textiles like an area rug, a machine such as a counter rotating brush (CRB) unit. The absorbent compound attracts or attaches to soils, and the soils and compound residues are brushed, blown (with the use of a low pressure air compressor) or dry vacuumed away. The contaminated carrier must be disposed of appropriately based on the type of contamination and local laws or regulations.
The absorbent compound process is very versatile and if the item can withstand the practice, many technicians use the “shake and bake” or “seal and squish” process where the item is placed in a zip locking bag along with the cleaning media, moved around vigorously, then removed from the bag and excess absorbent compound residues and soils are brushed, blown, or vacuumed away.
Dry Foam Cleaning Method
The dry foam cleaning method is a little more aggressive on soils and can be a more destructive cleaning process than absorbent powders - but it can be a great choice and when cleaning delicate textiles and surfaces such as dolls hair and clothing, taxidermy, some furs, hand painted figurines, collectables, historical or delicate fabrics, and even paper or cardboard when used correctly.
Creating an extremely thick, dense, very dry cleaning foam is achieved with the use of a natural sponge or mixer (I like to use an electric whip) and industry formulated products such as Prochem’s Fine Fabric Shampoo. Be warned: many cleaning products used to create dry foam are loaded with solvents and can dissolve or damage solvent soluble surfaces, paints, inks, and some photos. Quality professional products, usually called “foam shampoos”, will foam well and remove soils through the possess of emulsification, soil suspension, or encapsulation, sometimes referred to as crystallization. As the foam dries, specialty polymers in the product will surround the soil and dry to a fine, microscopic residue that is brushed, blown, or dry vacuumed away.
Dry Foam Cleaning Instructions:
- Begin by diluting and mixing the foam cleaning shampoo according to the directions on the label. Use a plastic bowl or bucket for this step.
- Use an electric beater, mixer, or a natural sea sponge to whip the shampoo solution until you see large bubbles forming, approximately the size of golf balls.
- Continue to whip the bubbles until they transform into a fine, dense, stiff dry foam with a texture resembling shaving cream. This process may take several minutes, so be patient.
- Once the dry foam is ready, use a slightly damped natural sea sponge, horsehair brush, natural fiber paint brush, or foam swab to scoop up the foam from the top of the bucket. Ensure that only the stiff, dry foam is used, not any wet solution.
- Work in sections, applying the foam onto the surface, fibers, or fabric, and gently agitate it in a manner that won't cause damage. Use gentle mechanical agitation, moving in the direction that is safe for the surface.
- Allow the foam to air dry completely, or if needed, speed up the drying process by using air movers or a hairdryer set to a cold setting.
- Once the foam is dry, use a dry vacuum, blow, or brush to remove any loosened soils and cleaning solution residues from the surface.
- Repeat the process as necessary until the desired level of cleanliness is achieved.
Related Articles: